Guide to Integrating Google Colab with GitHub
- Updated Feb 22, 2026: Operation procedures for Colab and GitHub were revised to align with the latest recommended workflow.
- Updated Jan 19, 2026: Content rewritten to reflect the latest development environment.
In this guide, we will explain practical steps to migrate your Python code from Google Colab to a professional development workflow using GitHub and local editors like VSCode or Cursor.
If you have been developing solely on Colab, these steps will help you establish version control with GitHub and a comfortable local editing environment, enabling a more efficient and scalable development process.
- Repository Preparation: Setting up the environment on GitHub.
- Initial Integration: Safely migrating code from Colab to GitHub.
- Local Setup: Configuring modern editors (VSCode, Cursor, etc.).
- Development Workflow: Establishing a daily development cycle.
Current Status and Goals
- Current Status
- Code exists only on Google Colab (.ipynb files)
- GitHub account is ready, but no repository has been created yet
- No code exists in the local environment
- Version control with Git has not been implemented
- Goals
- Manage code history and versions via GitHub
- Enjoy a comfortable editing experience in VSCode, Cursor, or other editors
- Maintain seamless execution and testing on Google Colab
1. Preparing the GitHub Repository
First, create a "container" (repository) on GitHub to receive the code from Colab.
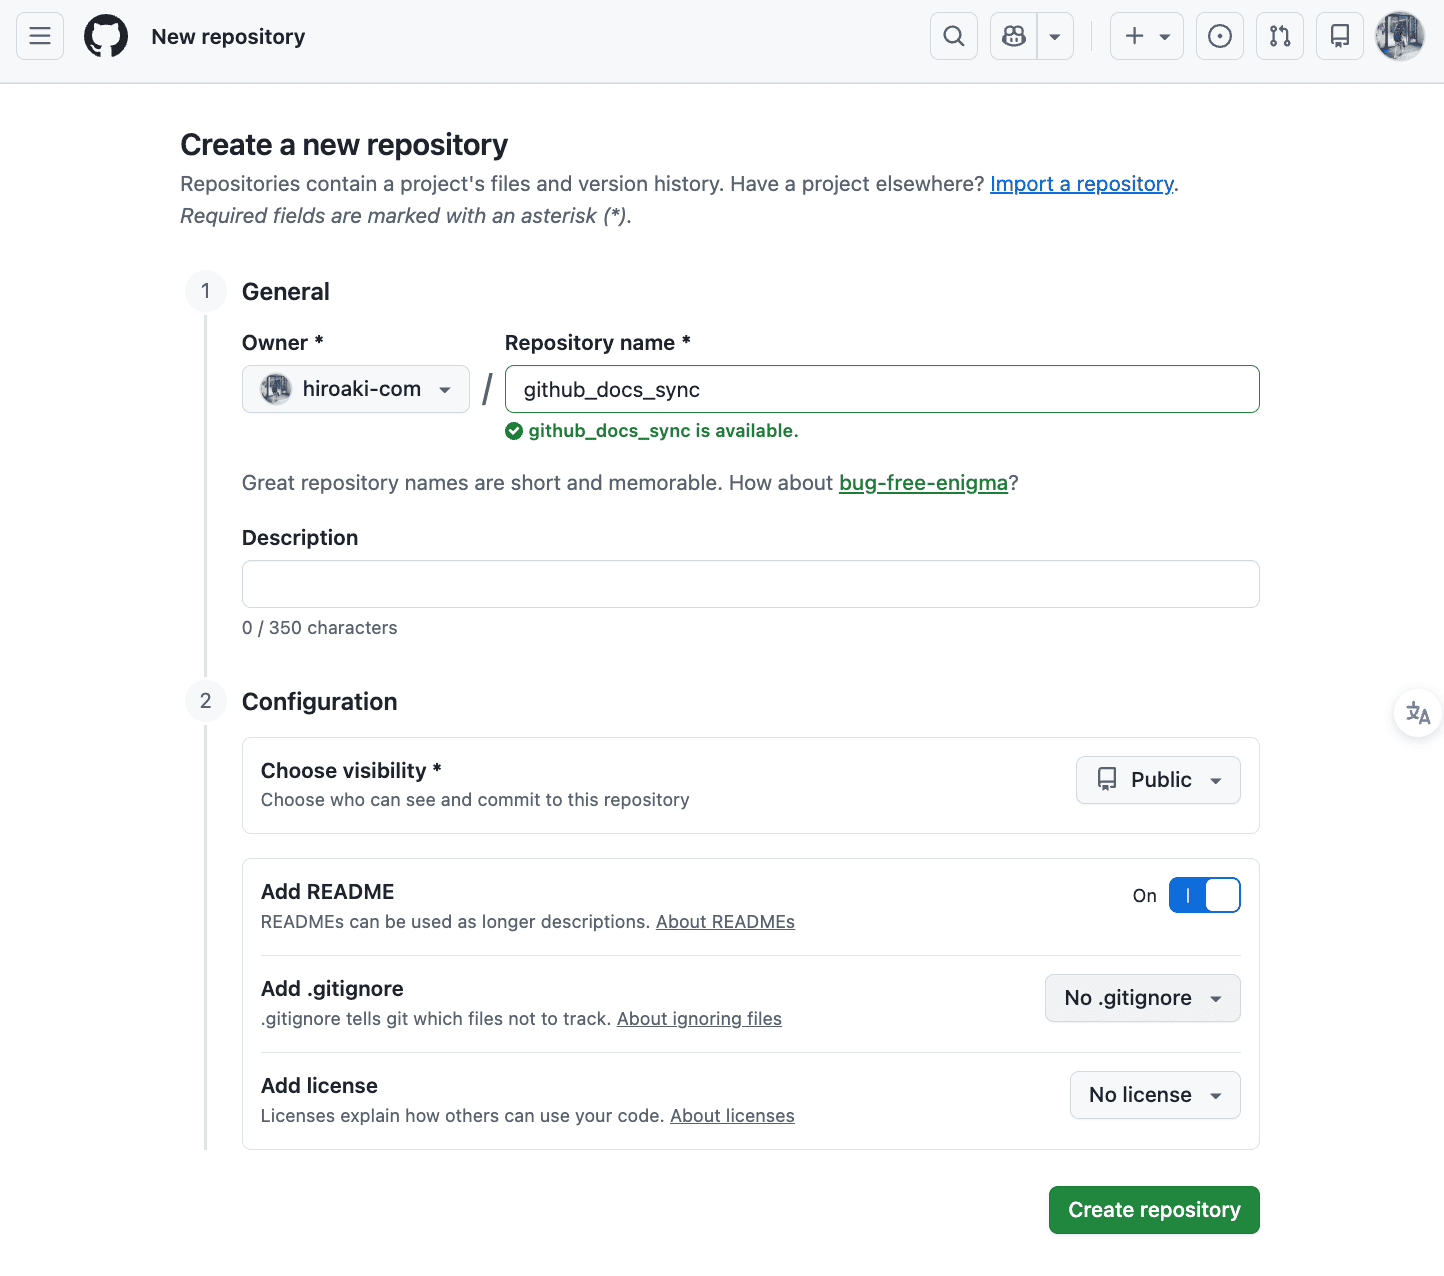
- Log in to GitHub and click the "+" icon in the top right, then select
New repository. - Enter a
Repository name(e.g.,colab-data-analysis). - Choose
PublicorPrivate. Private is recommended for personal projects. - Under
Initialize this repository with:, checkAdd a README file.- Note: Creating a README automatically generates the
mainbranch, making the Colab integration smoother.
- Note: Creating a README automatically generates the
- Click the
Create repositorybutton.
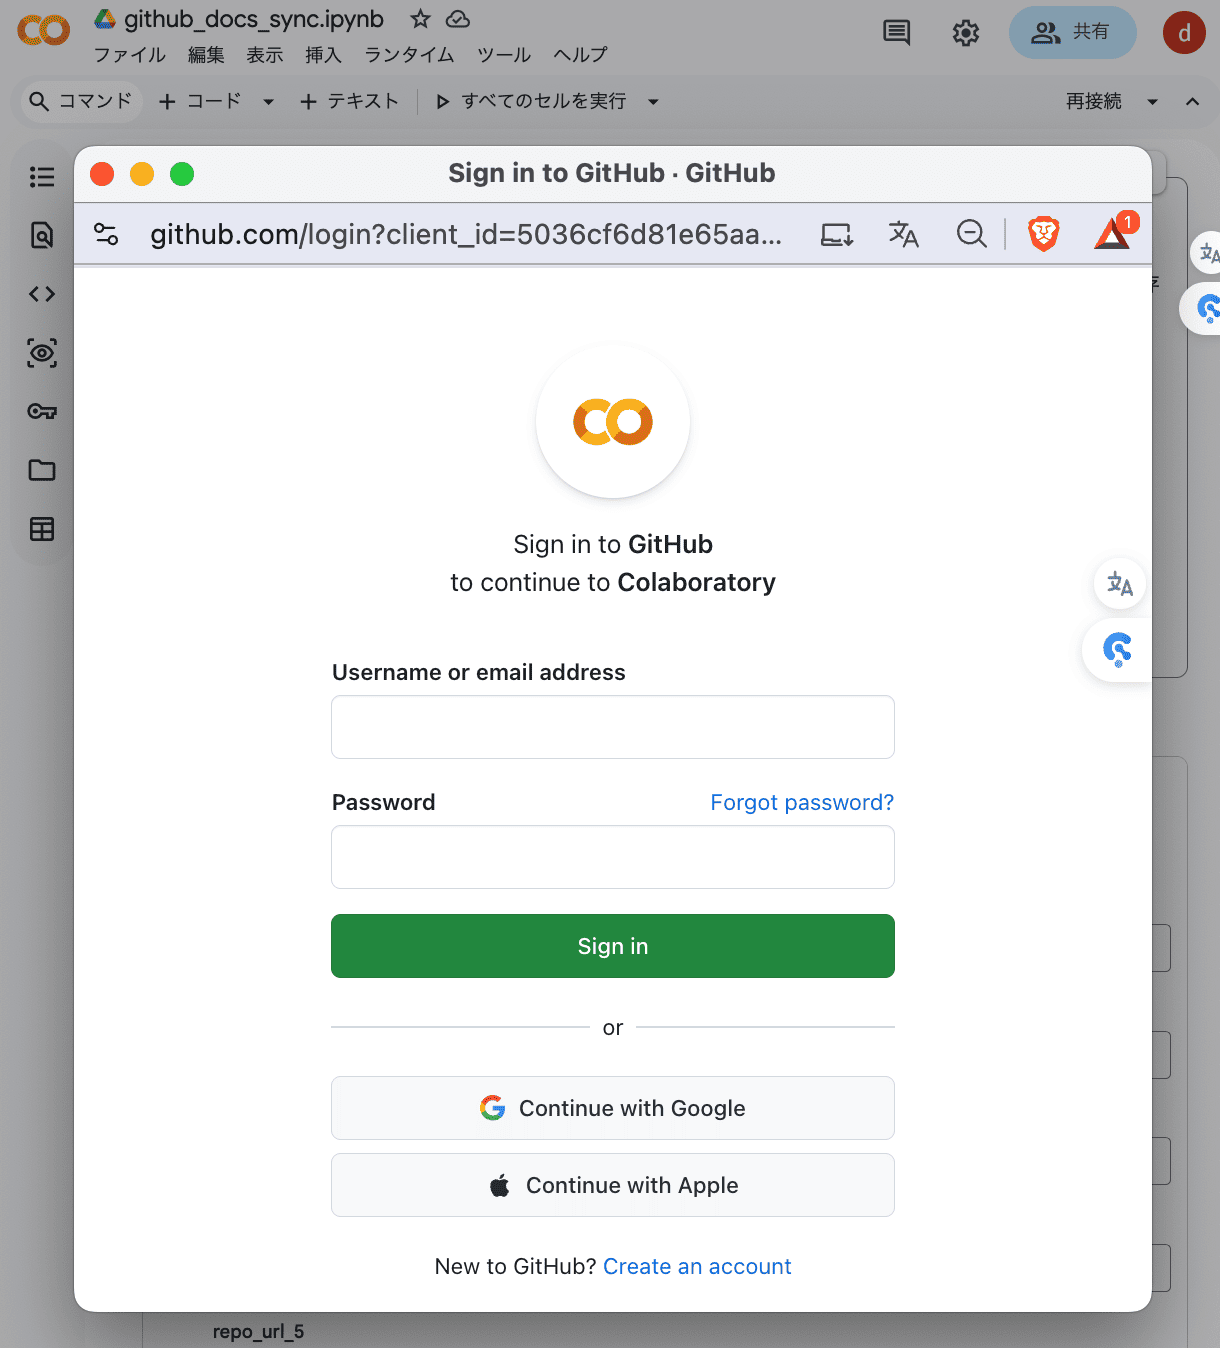
2. Saving from Colab to GitHub for the First Time
Save your current Colab notebook into the repository you just created.
- Open the target notebook in Google Colab.
- From the menu, select
File>Save a copy in GitHub.

If it's your first time or your session has expired, a popup will appear requesting access for Google Colab to your GitHub account. Click "Authorize googlecolab" to allow the integration.
- Configure the save settings:
- Repository: Select the
your-username/your-repository-nameyou created. - Branch: Select
main. - Commit message: Enter a descriptive message like
Initial commit of notebook from Colab.
- Repository: Select the
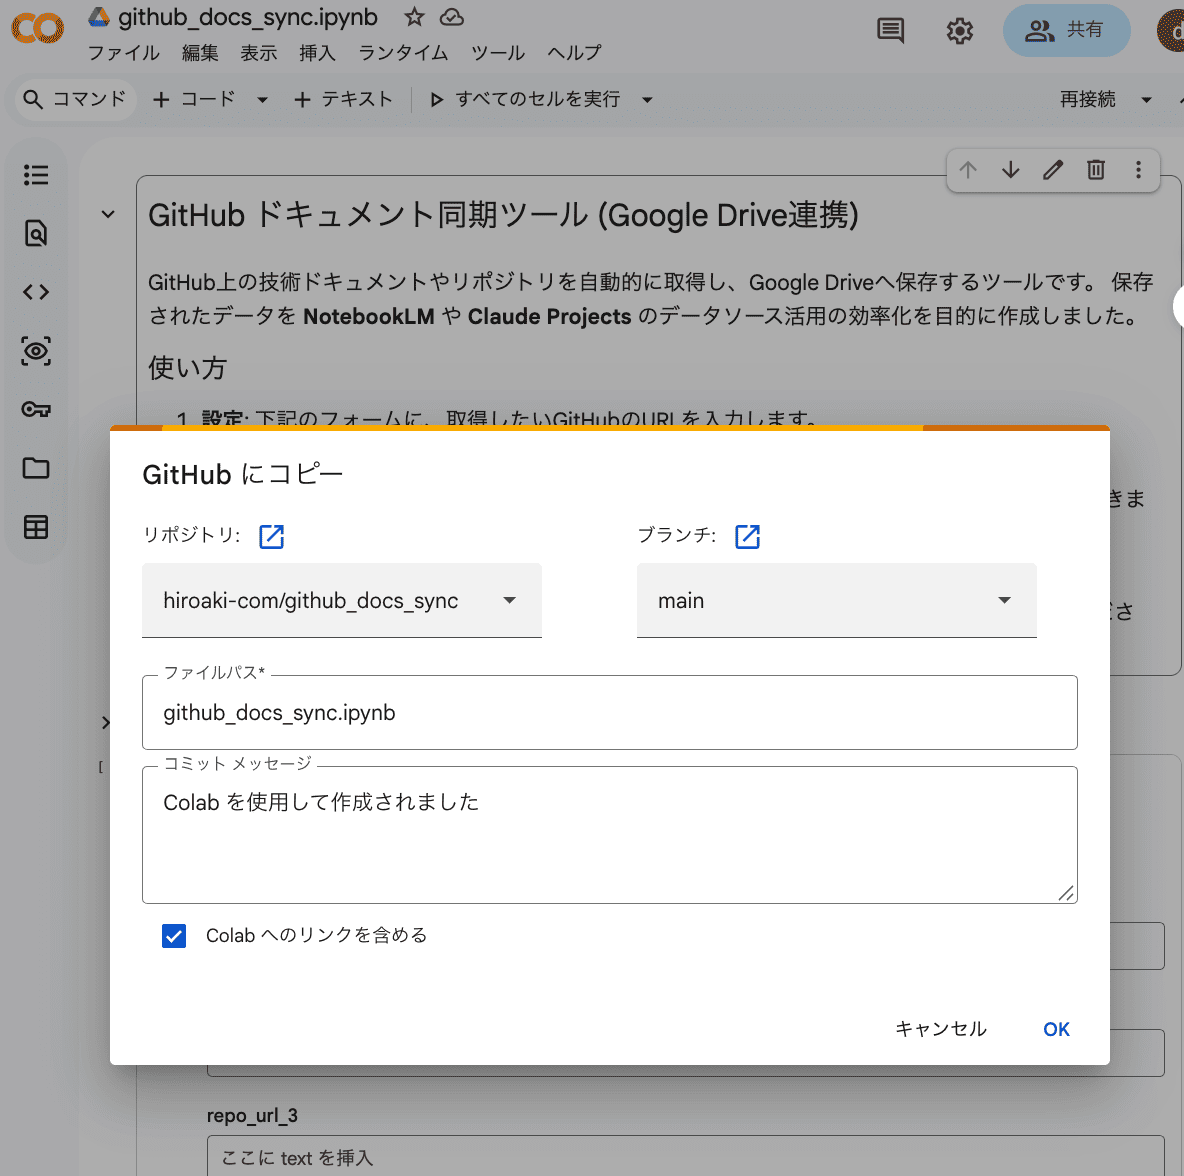
- Click
OKto execute the save.
3. Setting Up the Local Development Environment
Now, download (clone) the code from GitHub to your local machine and set up your editor.
Cloning the Repository
- On your GitHub repository page, click the green
Code▼button.
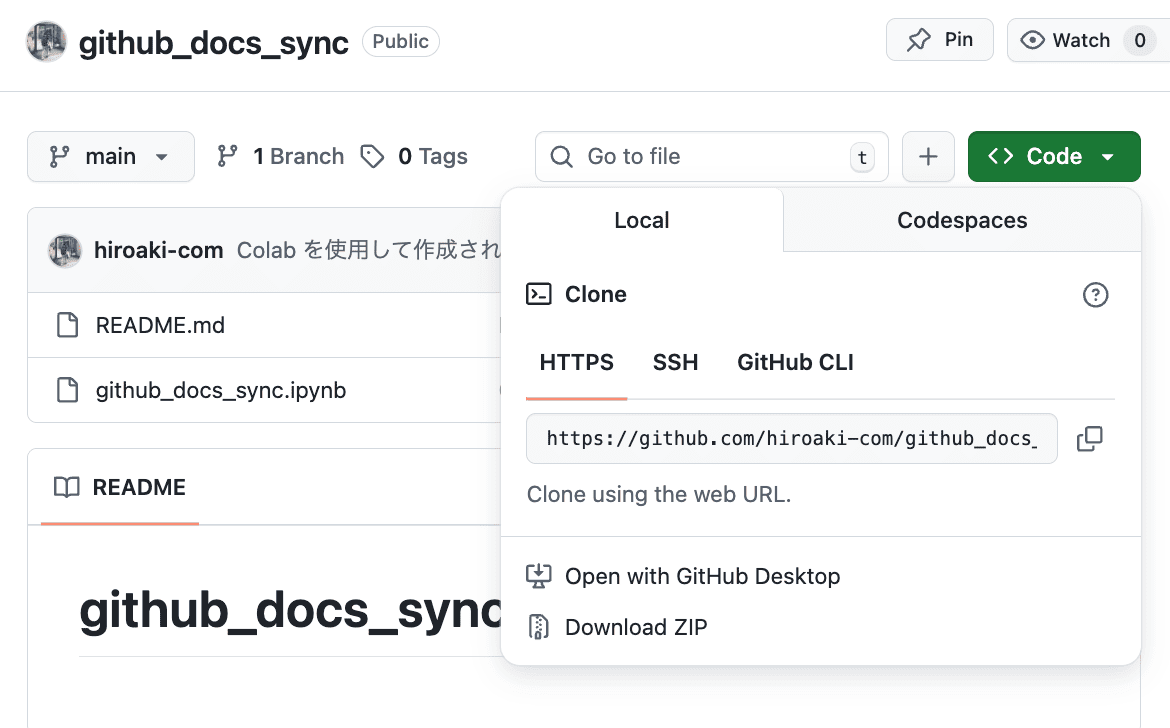
- Select the
HTTPStab and copy the URL. - Open your terminal, navigate to the directory where you want to save the project, and run the clone command.
# Navigate to your documents folder (or any preferred location)
cd ~/Documents

# Clone the repository
git clone [COPIED_REPO_URL]

# Enter the cloned directory
cd [REPOSITORY_NAME]
Editor Configuration (VSCode / Cursor)
While we use VSCode as an example here, the flow is identical for Cursor (the AI-powered editor) or other modern IDEs.
- Open the cloned folder in your editor (Tip: type
code .orcursor .in your terminal). - Install essential extensions for Jupyter Notebook (.ipynb) support:
Python: Language supportJupyter: Required for rendering and running notebooks
- Pro Tip: Managing .ipynb Files in Git
- To see strict text-based diffs for version control, right-click the
.ipynbfile in the explorer >Open With...>Text Editor.
- To see strict text-based diffs for version control, right-click the

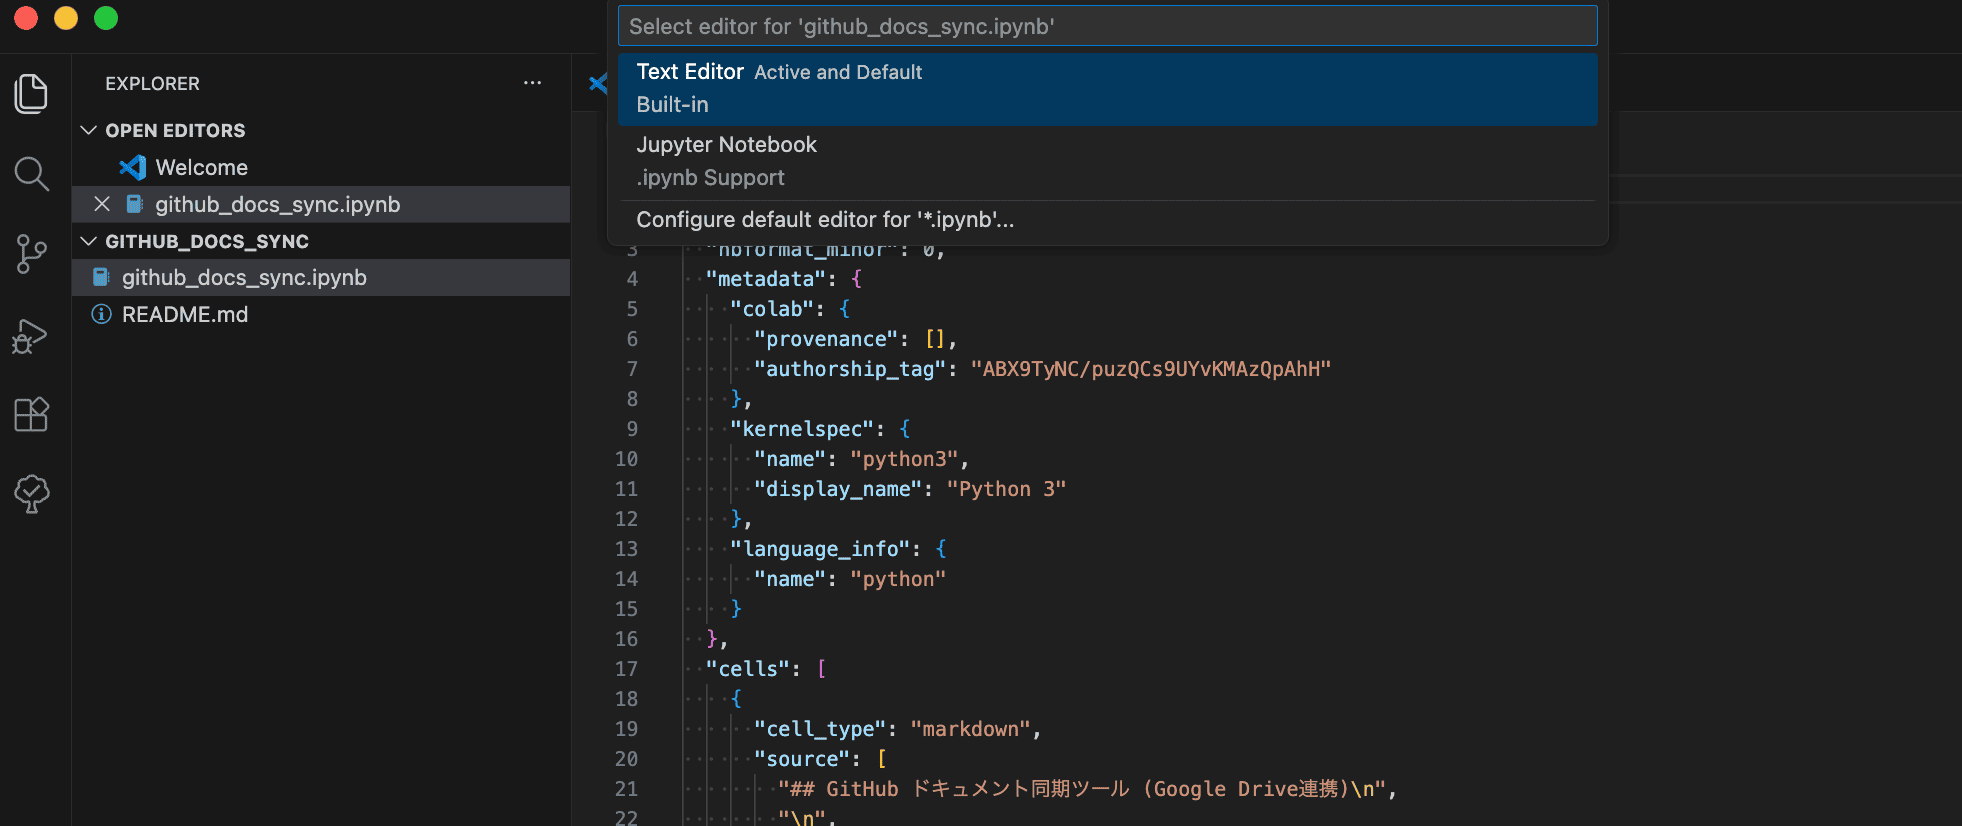
This displays the file in its raw JSON format, making it easier to track changes (diffs). When you want to edit or run it as a notebook, simply double-click it to open it in the standard Jupyter interface.
4. Daily Development Workflow
From Editing to GitHub Sync
-
Edit Code Locally
- Use your favorite editor (VSCode/Cursor, etc.) to implement ideas and take advantage of AI completions.
-
Push Changes to GitHub
- Once editing is complete, use the terminal to push your changes.
git add .

# Example messages: feat(new feature), fix(bug fix), docs(documentation)
git commit -m "feat: add data preprocessing logic"

git push origin main -
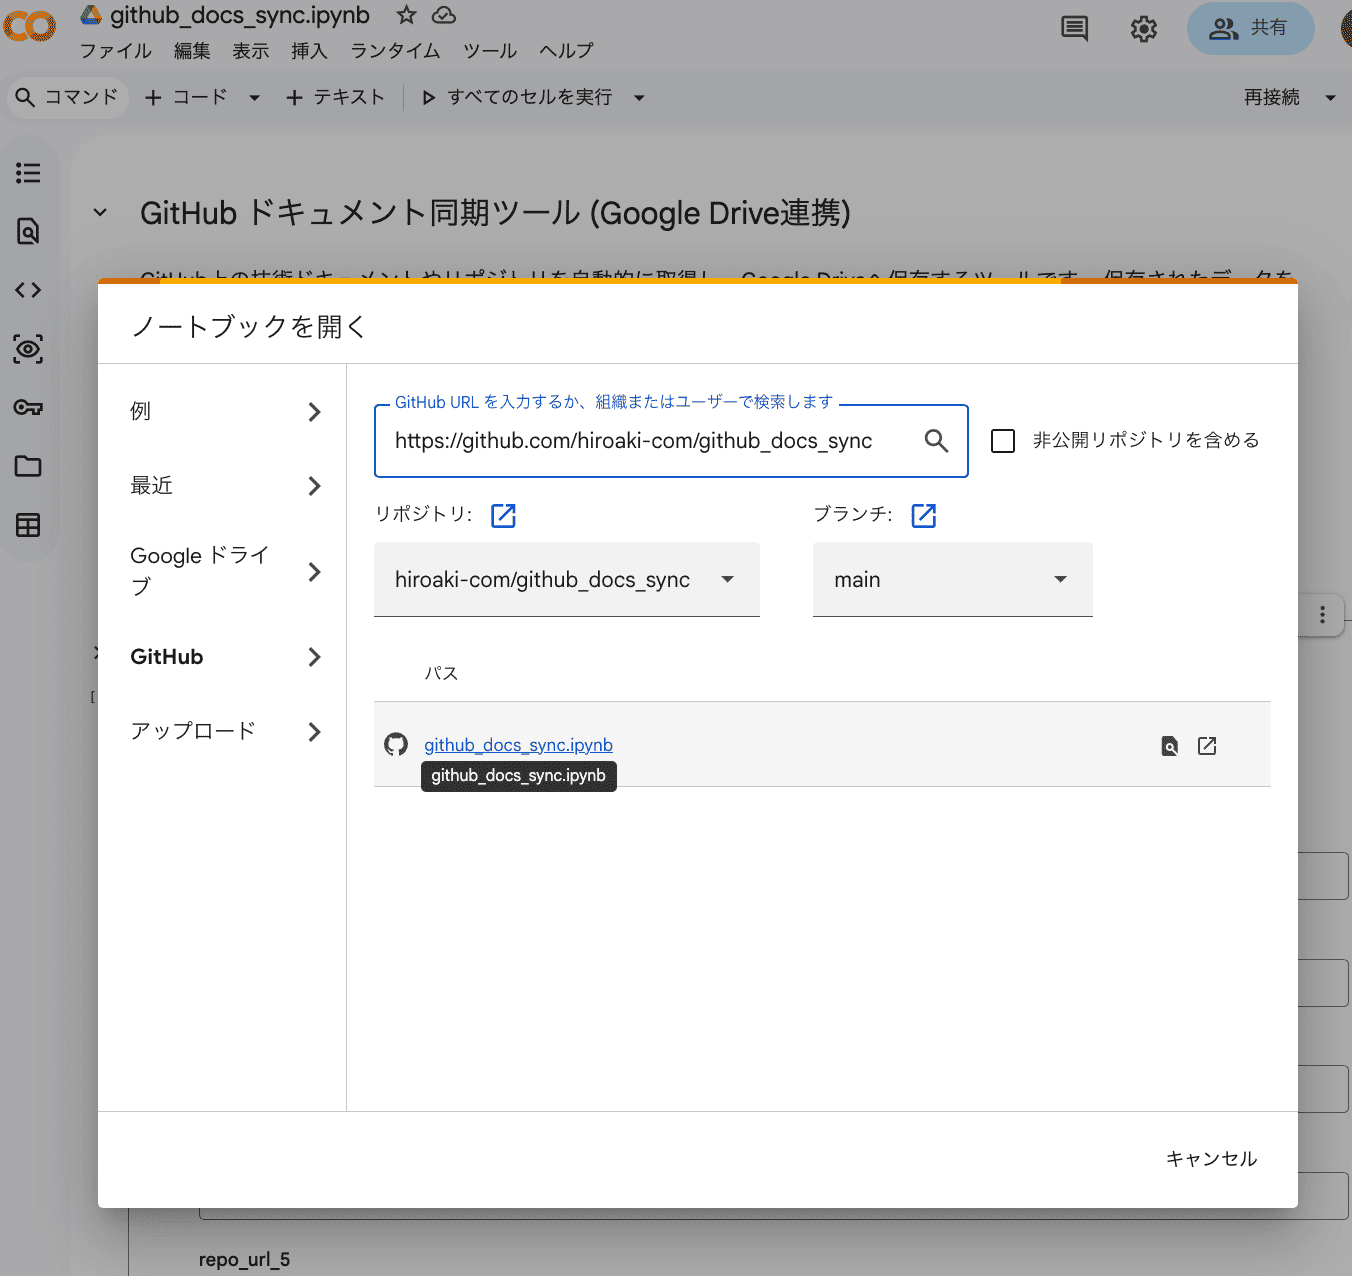
Verify/Run on Colab
- Open Colab, go to
File>Open notebook, and switch to theGitHubtab.
- Open Colab, go to
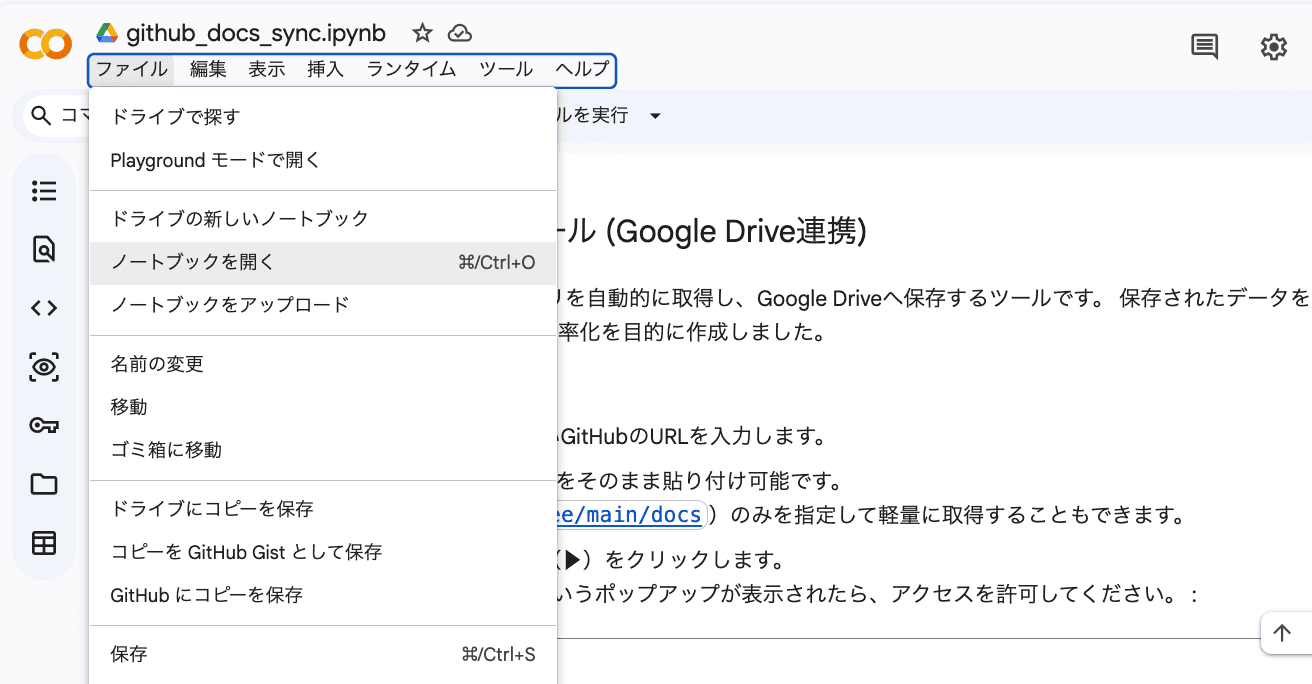
- Select your repository (or search by URL) and open the updated notebook.
Important Operation Rules
Treat GitHub as the single source of truth and follow the rules below to avoid conflicts from editing in both Colab and local.
1. When working locally
Before starting work
Run git pull origin main before you start editing. If you have unpushed changes, commit and push first, then pull.
When you finish editing
Run git add . → git commit -m "message" → git push origin main.
2. When working on Colab
Before starting work
Do not keep using an existing tab. Each time, open the notebook via File > Open notebook > GitHub tab.
🚨 Edits are not saved to GitHub automatically. Changes will be lost if you close the browser.
When you finish editing
File>Save a copy in GitHub(recommended)- If you need to continue later,
File>Save a copy in Driveis also acceptable - After saving, run
git pull origin mainon your local machine to sync - Do not start work directly from the Drive-saved copy
3. No simultaneous editing
The following are strictly prohibited:
- Saving to GitHub from Colab while you have unpushed local changes
- Editing the same content in Colab and locally at the same time
- Using a Drive-saved copy for long-term work
Always follow "Sync before editing → Edit → Push to GitHub."
4. When a conflict occurs
Resolve conflicts in your local environment.
- Conflict is detected when you run
git pull - Resolve using the diff/merge tools in VSCode/Cursor, etc.
- After fixing, commit and push
Resolving conflicts on Colab is difficult; always handle conflicts locally.
Conclusion
By following this setup, you create a powerful development environment that leverages the best of all worlds:
- GitHub: Reliable version control and history.
- Local Editors (VSCode/Cursor): High-speed coding with AI and rich extensions.
- Google Colab: On-demand cloud GPU/TPU resources.
By following these simple operational rules, you can minimize conflict risks while enjoying a flexible and professional development workflow.