Fixing Captive Portal Issues|Tips to Improve Public WiFi Connection Performance

1. Introduction
Have you ever tried connecting to public WiFi at a café or hotel, only to find that the authentication screen (captive portal) takes forever to appear, or doesn't show up at all?
I frequently struggled with this issue while working remotely, feeling the stress of "not being able to start work because I can't connect to the internet." However, after some investigation, I discovered that past WiFi connection history accumulated on the device was the culprit.
Based on my personal experience, this article explains how to organize and delete unnecessary WiFi history on both Mac and iPhone. This simple maintenance can improve the speed at which the login screen appears and ensure smooth connections to public WiFi.
2. Verification Environment
| Item | Details |
|---|---|
| Model | MacBook Air (M1, 2020) |
| OS | macOS Sequoia 15.1 |
Note: The procedures in this article are equally effective for iPhone (iOS).
3. The Issue and the Cause
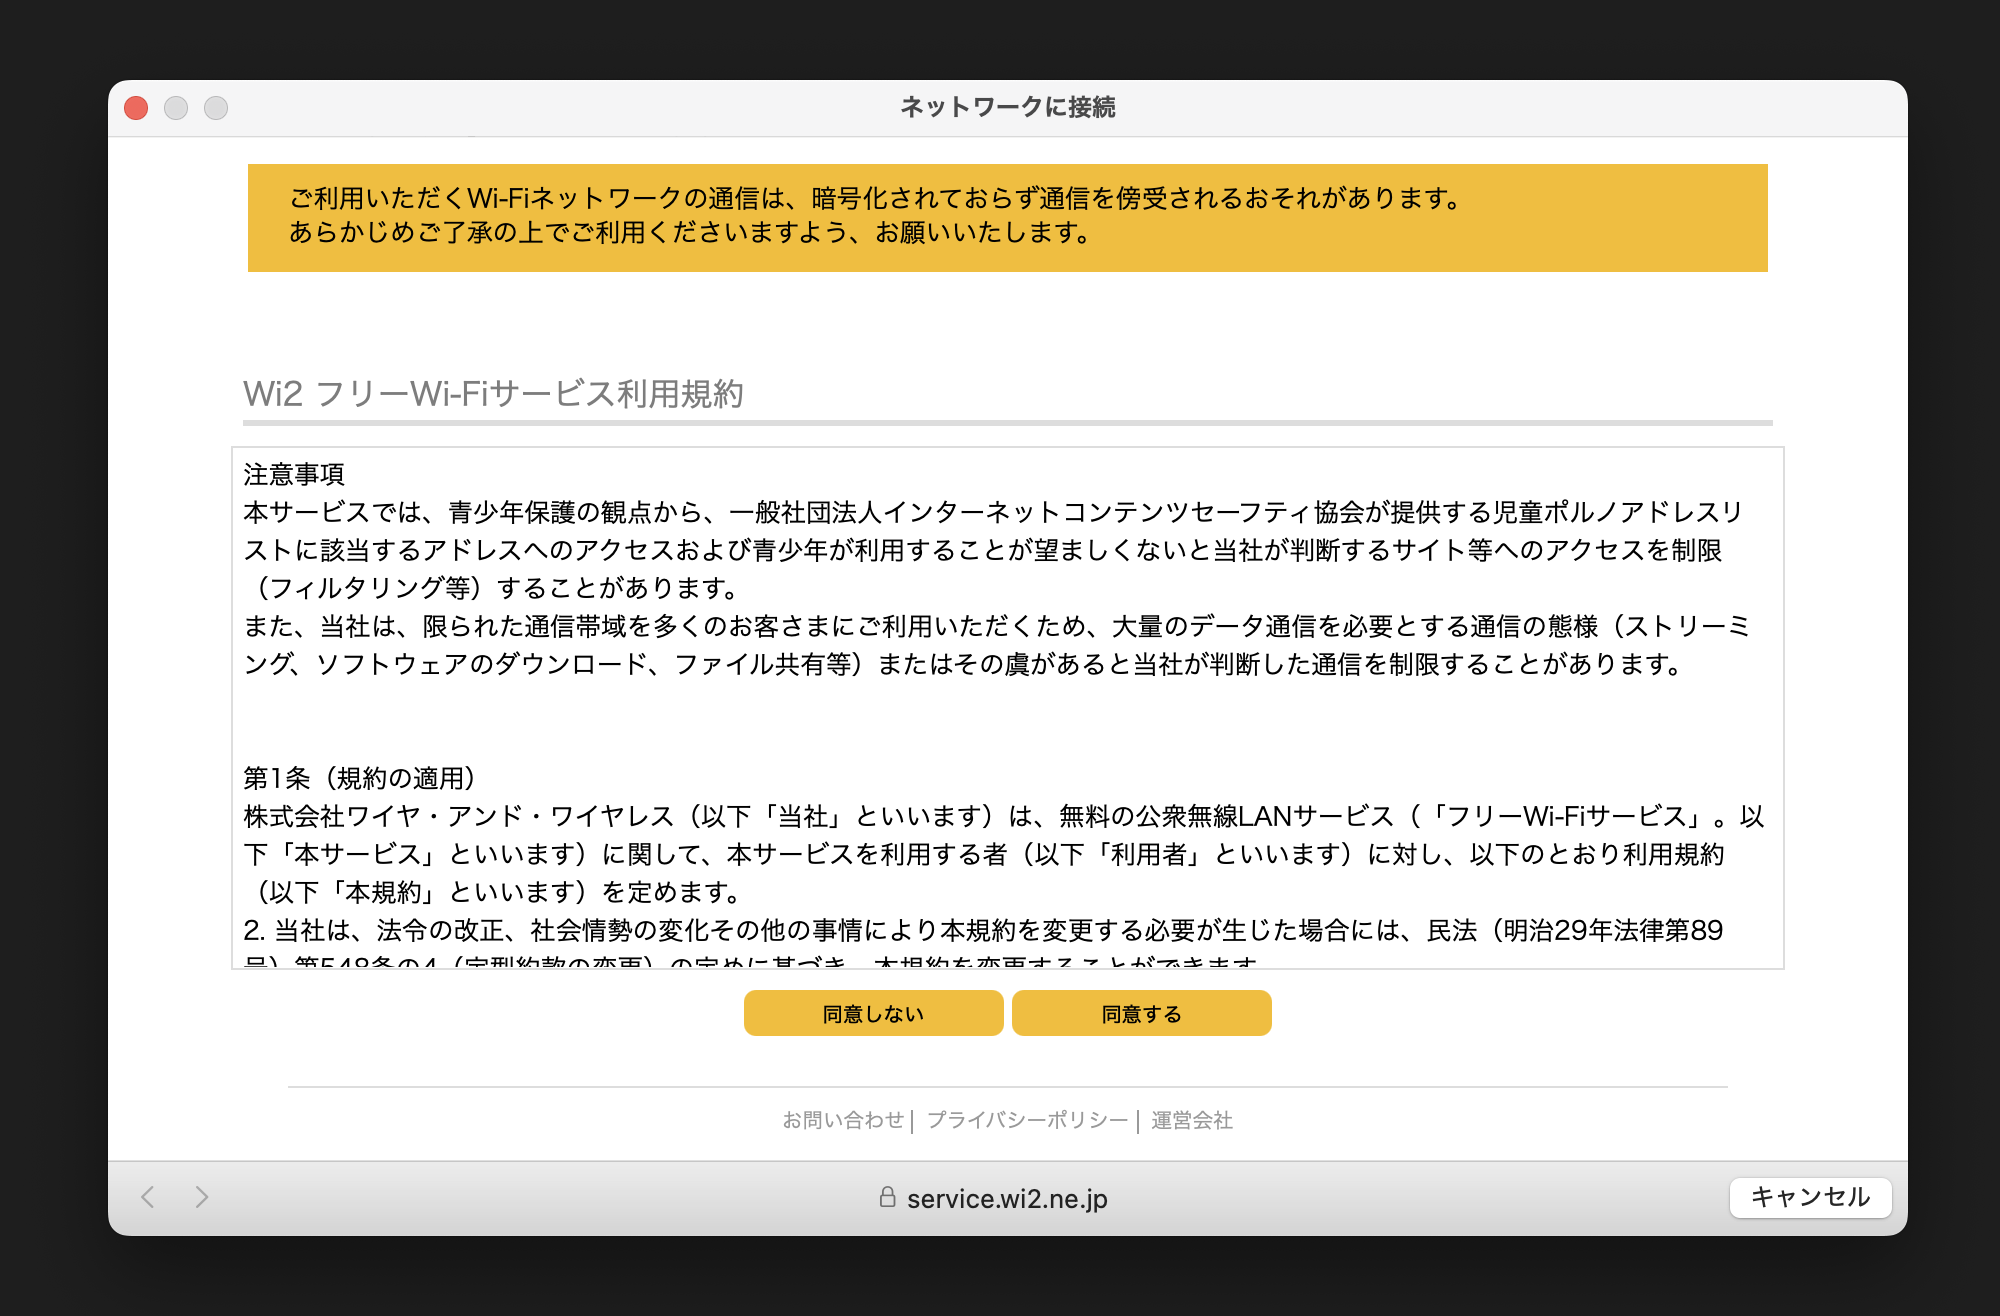
What is a Captive Portal?
A Captive Portal is the authentication web page that automatically appears when you connect to a public WiFi network, asking you to agree to terms of service or log in. You cannot access the internet until you complete authentication on this screen.
The Problem
Sometimes this screen fails to load, or takes a very long time to appear. As a result, no matter how many times you reconnect to the WiFi, you remain offline.
Main Cause
This delay or failure is often caused by a large amount of WiFi connection history saved on your device.
- Processing Delay: When connecting to WiFi, your device compares the current signal against a list of all network information (SSIDs) it has ever connected to. If this history contains dozens of networks, the matching process creates a load, causing the request to call up the authentication screen to time out.
- Confusion from Duplicate Networks: If multiple SSIDs with similar names are saved for the same facility, the device may not know which one to connect to, leading to repeated connection failures.
Example: Networks connected to at a shopping mall in the past
- Shop-Free-WiFi
- Shop-Free-Wi-Fi_Guest
- Shop_WiFi_2.4G
↓
The device attempts to connect using the wrong network information and fails authentication.
By organizing your history, you prevent these delays and confusion on the device side, promoting a smoother connection.
4. Solution: Deleting WiFi History (Mac)
Follow these steps to delete unnecessary WiFi network history stored on your Mac.
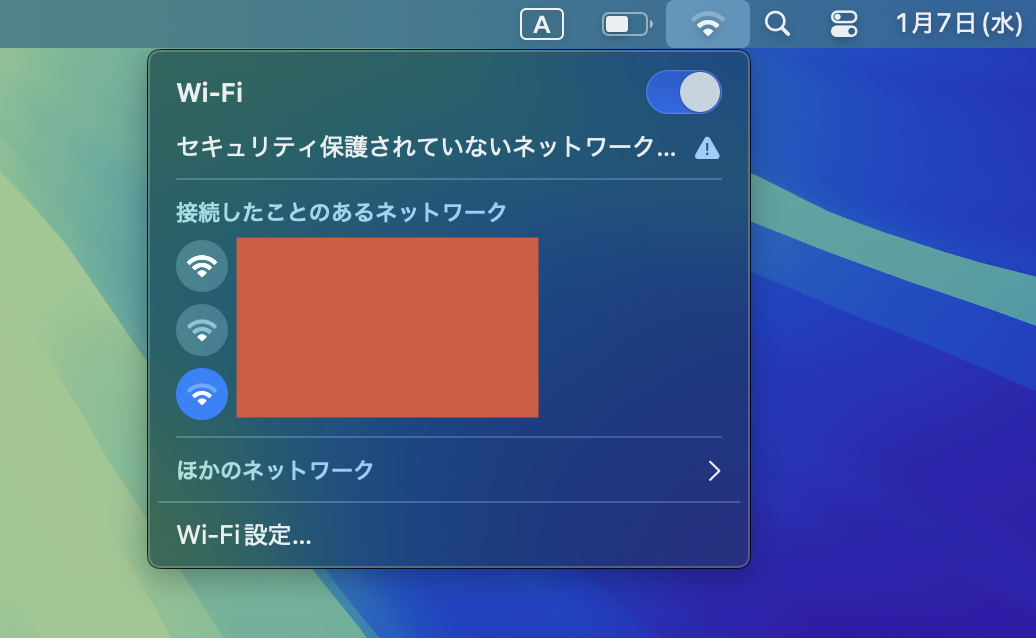
Step 1: Open Wi-Fi Settings
Click the Wi-Fi icon (the fan shape) in the menu bar at the top right of the screen. Select "Wi-Fi Settings..." from the menu.
This will launch the "System Settings" app and take you directly to the Wi-Fi settings screen.
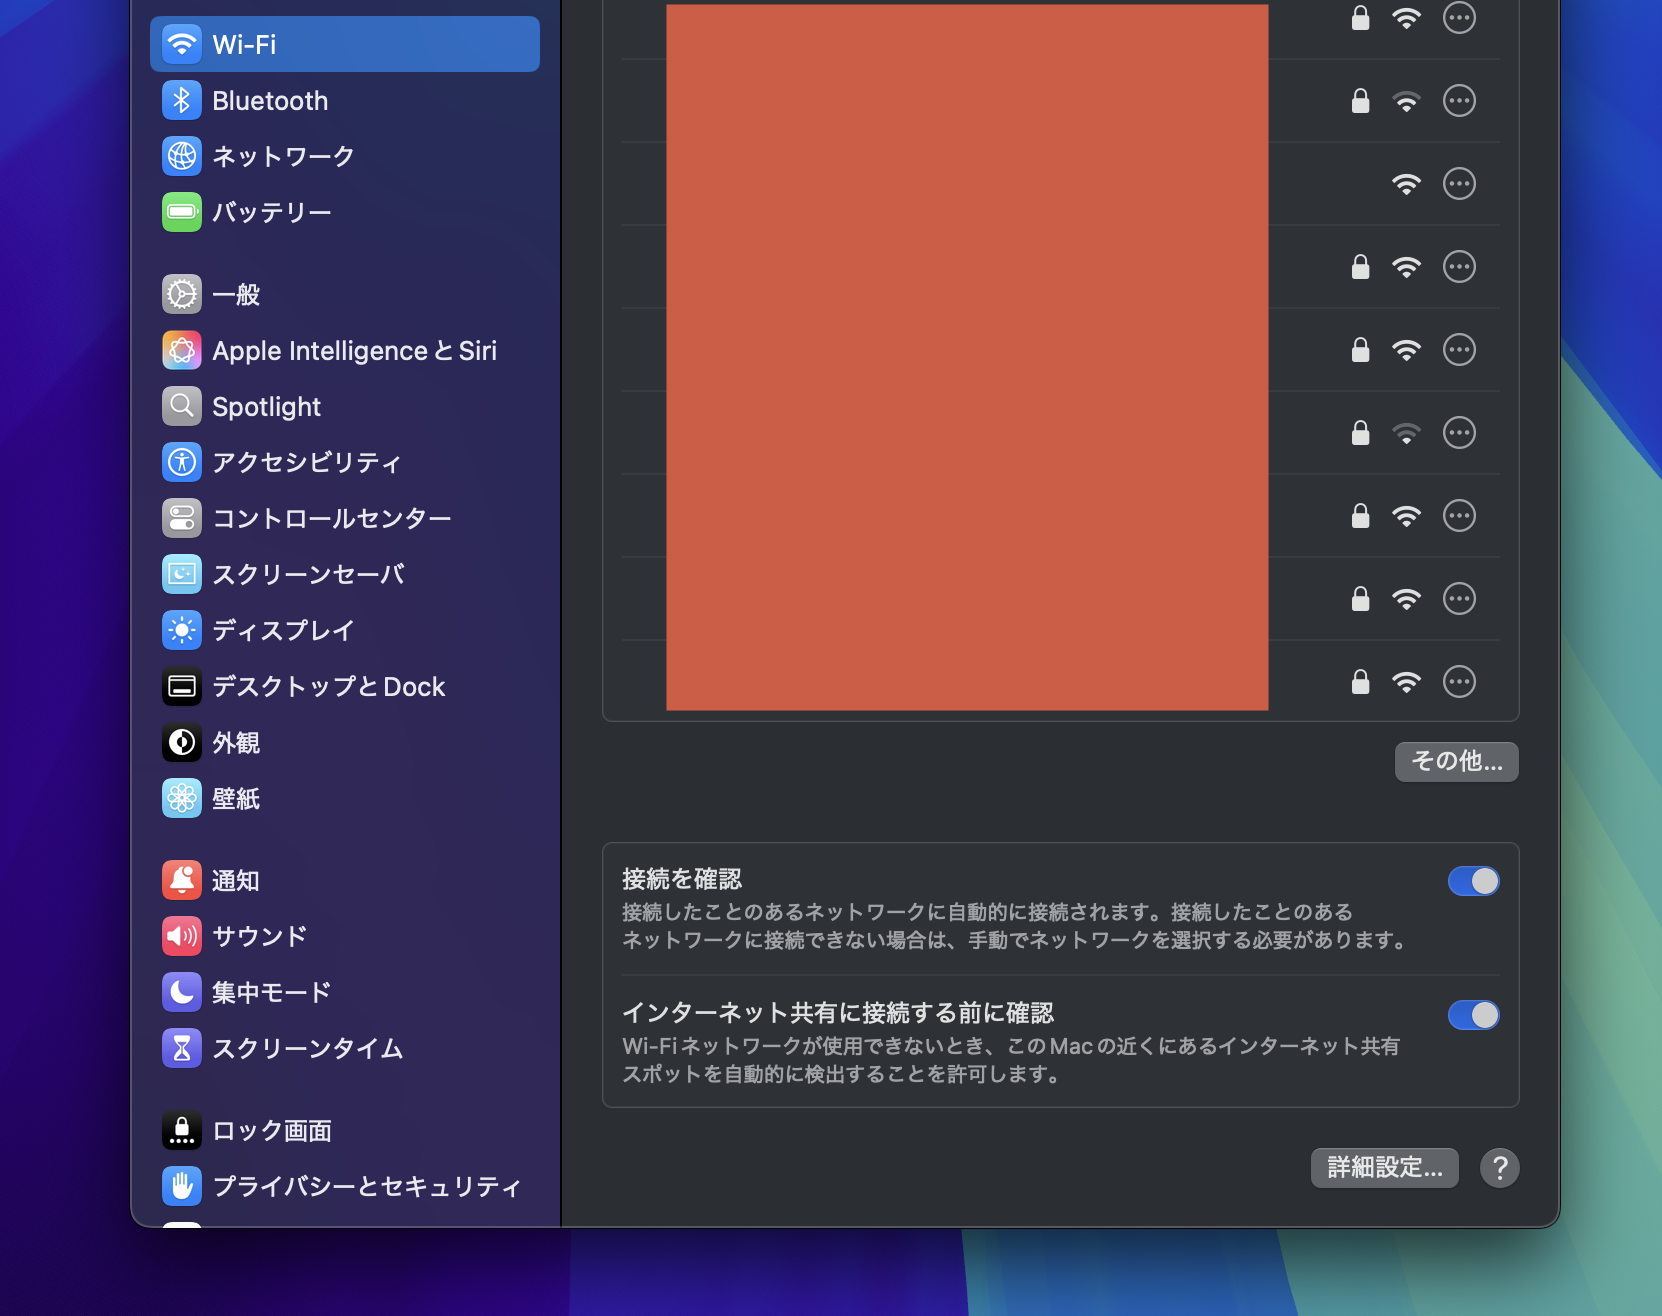
Step 2: Open Advanced Settings
Once the Wi-Fi settings screen is open, scroll down to the bottom and click the "Advanced..." button in the bottom right.
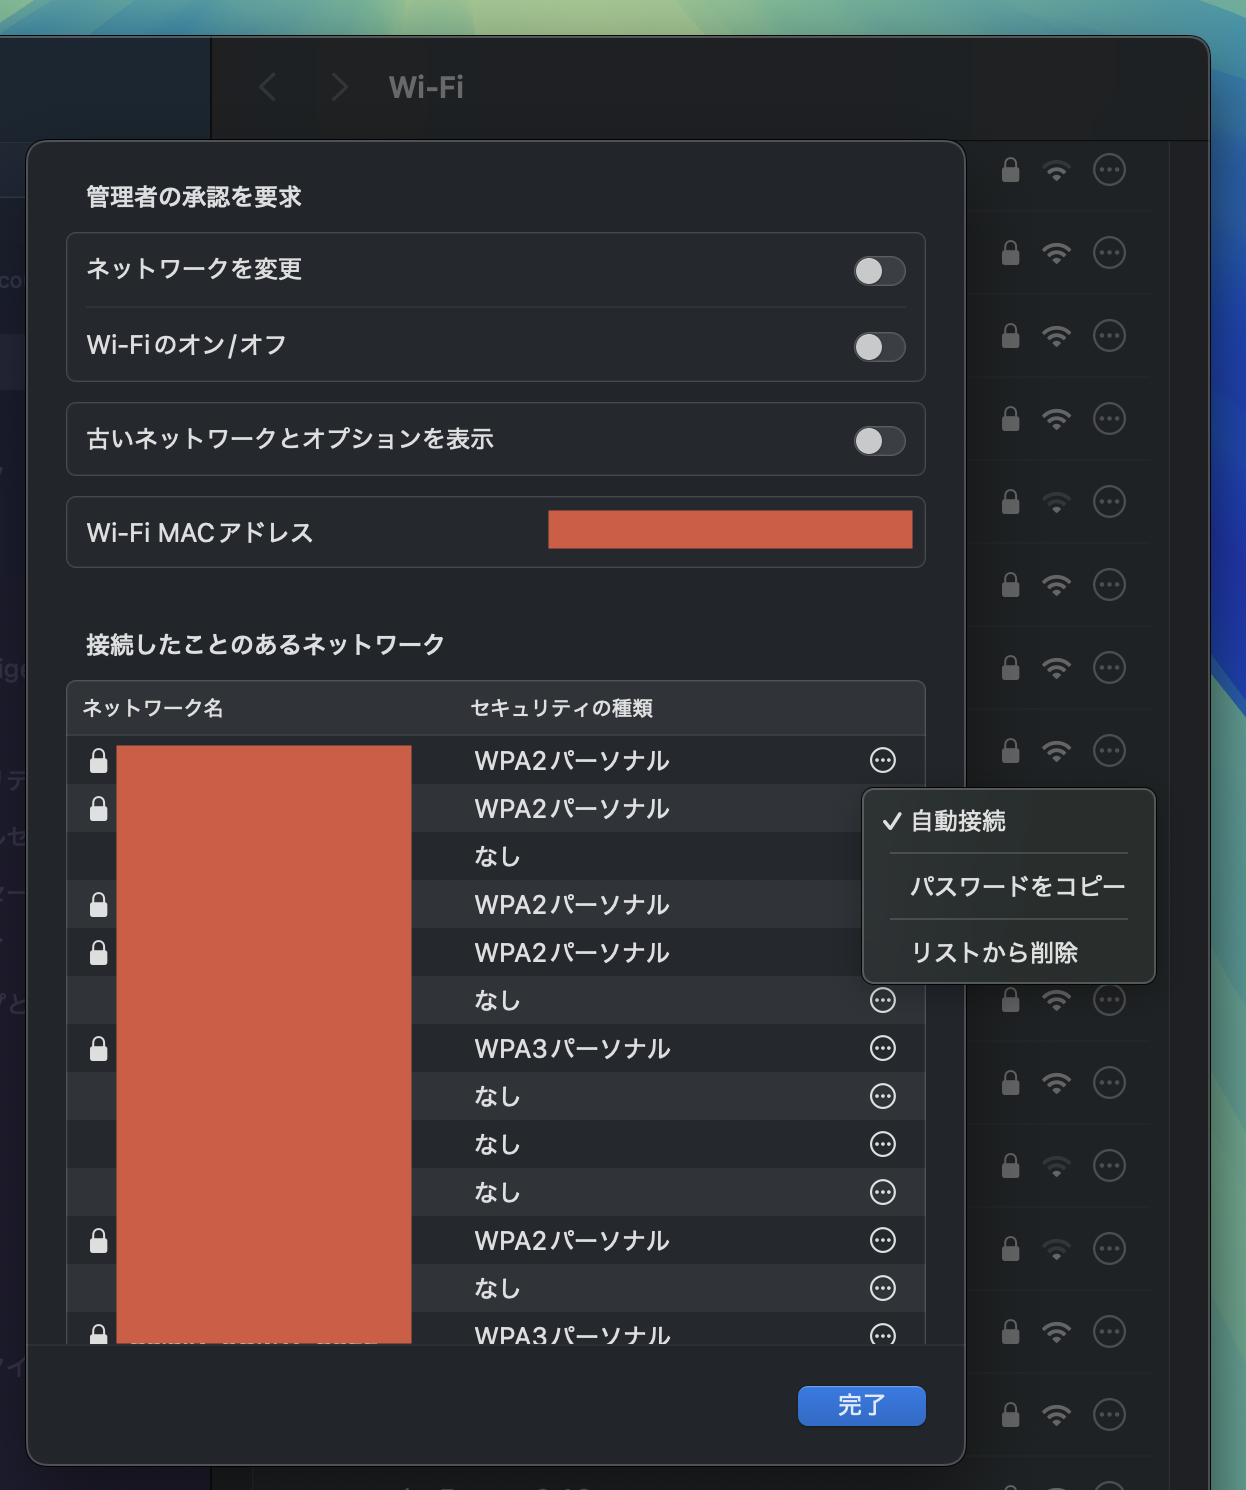
Step 3: Remove Unnecessary Networks
A list of "Known Networks" (WiFi networks you have connected to in the past) will be displayed.
- Find the network you want to delete and click the "..." (three dots) icon on the right side of the item.
- Select "Remove From List" from the menu that appears.
- When the confirmation dialog appears, click "Remove".
- Finally, click the "OK" button at the bottom right to save your changes.
Note: You can also select multiple networks by holding down the Command ⌘ key and delete them all at once.
5. (Reference) How to Distinguish Which History to Delete
I have summarized which history should be deleted by priority.
| Priority | Target Network | Specific Examples |
|---|---|---|
| High (Recommended) | One-time visit locations | hotel-guest-room-xxx, airport-free-wifi-ab, etc. Facilities you do not plan to visit again. |
| High (Recommended) | Duplicate networks | Free_WiFi_A, Free_WiFi_A_Guest, etc. If there are multiple similar SSIDs for the same facility, keep only the main one. |
| Medium | Unknown names | aterm-xxxxxx-g, unknown-ssid, etc. Networks where you cannot recall the usage. Deleting these is also desirable for security. |
| Low (Keep) | Daily use locations | Home_Network, Company_WiFi, Cafe_Chain_Wi-Fi, etc. Home, work, and frequently visited cafes. |
The ideal number of WiFi history entries is around 20 to 30. In my environment, I had over 50 saved, but simply organizing them dramatically improved performance.
6. Solution (iPhone)
Just like on Mac, organizing connection history on your iPhone can improve performance.
- Open the "Settings" app and tap "Wi-Fi".
- Tap "Edit" in the top right corner of the screen. (Authentication via Face ID/Touch ID is required).
- A list of known networks will be displayed.
- Tap the "−" (minus) icon to the left of the network name you want to delete, then tap "Delete".
Note: Depending on the iOS version, you may need to tap the "ⓘ" button to the right of the network name and select "Forget This Network" individually.
Summary
The problem of public WiFi authentication screens not appearing is surprisingly often caused by "WiFi connection history piling up."
- Delete unnecessary network history (aim for 30 or fewer).
- Clean up duplicate or similar SSIDs.
- Review your list periodically every few months.
By practicing these simple maintenance steps, I found that connecting to public WiFi on both Mac and iPhone became significantly more comfortable. This is a setting that is easily overlooked, but if you are struggling with similar issues, why not review your WiFi settings today?